How to Clean a Record Player Stylus
The stylus tip traces a microscopic groove at several thousand vibrations per second. Even a tiny piece of lint on the tip is enough to cause distortion, sibilance, or skipping. Regular stylus cleaning is the single highest-return maintenance habit for any record player owner — it takes 30 seconds and extends both stylus and record life significantly.
How Often to Clean
| Situation | Clean? |
|---|---|
| Before every play session | ✅ Dry brush |
| Every 10–15 hours of play | ✅ Liquid clean |
| After playing a dusty or old record | ✅ Dry brush immediately after |
| If you hear sudden distortion or sibilance | ✅ Check and clean before anything else |
| After long storage (weeks unused) | ✅ Dry brush before playing |
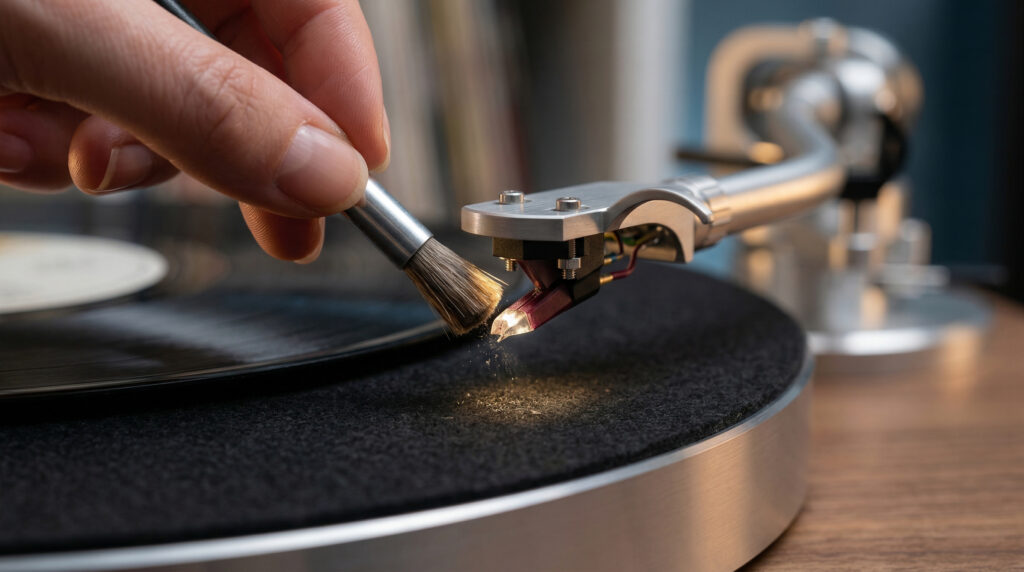
Method 1 — Dry Brush (Before Every Play)
What you need: A stylus cleaning brush — typically a small brush with very fine, soft bristles, often included with the turntable or available for $5–$15.
The correct motion is front to back — never side to side. The groove runs in a circle around the record; the stylus cantilever is delicate and can be snapped by a lateral brush stroke.
How to do it:
With the tonearm in its rest, lower the stylus onto the brush by pressing the cueing lever — or hold the brush under the stylus and bring the brush up gently to contact the tip. Brush in one direction only: front to back (away from the cartridge body). One or two strokes is enough. Inspect the brush — you should see a small amount of grey lint or dust on it.
Alternatively, lower the stylus gently onto the brush surface while it rests on a flat surface, then lift it back up. Do not slide the brush sideways across the tip.
Method 2 — Liquid Stylus Cleaner (Every 10–15 Hours)
What you need: Dedicated stylus cleaning fluid and a fine brush (often sold together for $10–$20). Do not use isopropyl alcohol directly — it can damage the stylus adhesive over time with repeated use.
How to do it:
Apply one small drop of stylus cleaning fluid to the brush — not directly to the stylus. Bring the brush up to contact the stylus tip from below, or lower the stylus gently onto the brush. Hold for 2–3 seconds to let the fluid dissolve the debris. Lift the brush away in a front-to-back motion. Allow 30–60 seconds for the tip to dry completely before playing a record.
Method 3 — Magic Eraser or Onzow Zerodust (Deep Clean)
For heavily contaminated styli — visible clumps of debris under magnification — a tacky cleaning medium can lift compacted buildup that a brush won’t remove. Products like the Onzow Zerodust use a soft gel that the stylus is lowered into; the gel grips and pulls debris from the tip as it’s raised back out.
Plain white Magic Eraser (melamine foam, dry only, no cleaning fluid) also works — lower the stylus gently 2–3 times onto the surface of a small piece. The micro-abrasive foam removes hardened deposits. Use sparingly — the melamine is mildly abrasive and should not replace regular brush cleaning.
What Never to Do
| Don’t | Why |
|---|---|
| Brush side to side | Snaps the cantilever — destroys the stylus |
| Touch the tip with your finger | Skin oils contaminate the tip and cantilever |
| Blow compressed air at the stylus | Can displace the cantilever or push debris deeper |
| Use pure isopropyl alcohol frequently | Can dissolve the adhesive holding the stylus to the cantilever |
| Apply liquid directly to the stylus | Fluid can wick up the cantilever into the cartridge body |
| Press down hard with the brush | Bends the cantilever — all contact should be very light |
How to Inspect the Stylus
Use a USB microscope ($15–$30) or a strong phone macro camera with a flashlight. A clean, unworn stylus tip is symmetrical and pointed — a small, bright point with no flat spots. Visible debris looks like grey or brown lint clumped around the tip. A worn stylus looks flat, chipped, or asymmetrical at the contact point.
If you see wear, it’s time to replace rather than clean. For Arkrocket players, order the AR-N60 replacement stylus. See our stylus replacement guide for step-by-step instructions.
Watch: How to Clean a Record Player Stylus
See also: How to Replace a Stylus · How to Clean Vinyl Records · Why Is My Record Skipping?
← Back to Fix & Setup