How to Replace a Turntable Stylus
A stylus (needle) is a consumable part. It wears down over hundreds of hours of use, and a worn stylus damages records while producing distorted, harsh sound. Replacing it is one of the simplest maintenance tasks on any record player — most take under two minutes with no tools required.
When to Replace the Stylus
| Signal | What It Means |
|---|---|
| Harsh sibilance on vocals (“s” sounds distorted) | Stylus worn — tip no longer tracking correctly |
| Loss of high-frequency detail | Diamond tip flattened from wear |
| Increased surface noise on clean records | Worn tip creating more groove contact noise |
| Visible flat spot or asymmetry under magnification | Tip worn unevenly — replace immediately |
| 500–1,000 hours of play reached | Standard replacement interval |
| Stylus tip missing or visibly broken | Replace immediately — playing further damages records |
Rule of thumb: If you play records 1–2 hours per day, replace the stylus every 1–2 years. If you’re unsure, inspect the tip under a phone macro camera or USB microscope — a worn tip looks flat or has visible chips rather than a clean, symmetrical point.
Which Replacement Stylus Do You Need?
You must use the correct replacement stylus for your specific cartridge. Using the wrong stylus damages the cartridge and produces poor sound. Check your turntable manual or the cartridge body for the model number.
| Turntable Model | Cartridge | Replacement Stylus |
|---|---|---|
| Arkrocket Cassini | AR-N60 | AR-N60 Replacement Stylus |
| Arkrocket Huygens | AR-N60 | AR-N60 Replacement Stylus |
| Arkrocket Polaris II | AR-N60 | AR-N60 Replacement Stylus |
| Arkrocket Discovery II | AR-N60 | AR-N60 Replacement Stylus |
| Audio-Technica AT-LP120XUSB | AT-VM95E | AT-VM95E or any VM95 series stylus |
| Audio-Technica AT-LP60X | ATN3600L | ATN3600L replacement |
| Fluance RT82 | Ortofon OM10 | Ortofon OM10 or OM series upgrade |
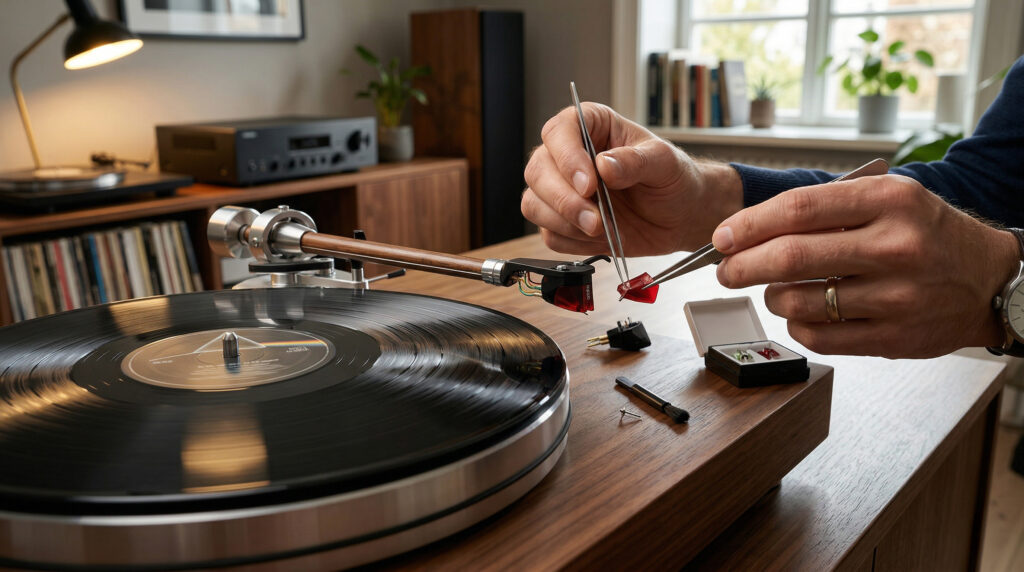
Step-by-Step: Replacing the Stylus
Most moving magnet cartridges use a snap-on stylus assembly — the stylus and its plastic body clip directly onto the cartridge body. No tools are needed for standard replacements.
Step 1 — Rest the tonearm safely
Make sure the tonearm is in its rest and secured with the lock. The turntable should be powered off. Position yourself so you have a clear view of the cartridge at the end of the tonearm.
Step 2 — Install the stylus guard on the old stylus
If you still have the original stylus guard, clip it onto the old stylus before removing it. This prevents accidental contact with the tip during removal and gives you something to grip.
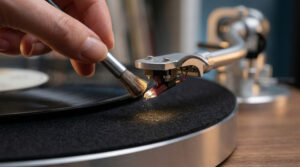
Step 3 — Remove the old stylus
Grip the stylus body (the plastic part, not the cantilever or tip) firmly between thumb and forefinger. Pull it straight forward and slightly downward — away from the cartridge body. It should release with a firm, smooth pull. Do not twist or pull sideways.
If it feels very stiff, check that you’re gripping the stylus body and not the cantilever. Never force it — the cartridge body can crack if pulled incorrectly.
Step 4 — Install the new stylus
Remove the stylus guard from the new stylus. Align the new stylus body with the cartridge — there is usually a locating pin or notch that aligns it correctly. Push it firmly straight back until it clicks or seats fully. Confirm it is secure by very gently tugging it forward — it should not move.
Step 5 — Verify tracking force
After replacing the stylus, recheck the tracking force setting. A new stylus may have a slightly different weight to the old one. Re-balance the tonearm and set tracking force to the recommended value for your cartridge. For the AR-N60: 3.5g.
See our tracking force guide for the full procedure.
Step 6 — Break in the new stylus
A new stylus benefits from a break-in period of approximately 20–40 hours of play before reaching optimal performance. During this time, play at moderate volume and avoid aggressive anti-skate settings. The stylus tip conforms slightly to the groove geometry during break-in — sound quality typically improves noticeably after the first 20 hours.
Watch: How to Replace a Turntable Stylus
FAQ
Can I upgrade to a better stylus at the same time?
Yes — many cartridge families offer multiple stylus grades. The Ortofon OM series, for example, goes from OM5 up through OM20, all fitting the same cartridge body. Upgrading from a bonded stylus to an elliptical or line-contact tip improves tracking accuracy and detail retrieval noticeably. Check whether your cartridge supports upgradeable styli before purchasing.
Is a replacement stylus the same as a replacement cartridge?
No. The stylus is the removable tip assembly that clips onto the cartridge body. The cartridge is the fixed component at the end of the tonearm that contains the generator. Most users only ever need to replace the stylus — cartridge replacement is needed only if the cartridge body itself is damaged or you want to upgrade to a fundamentally different cartridge type.
See also: How to Clean a Stylus · How to Set Tracking Force · Why Is My Record Skipping?
← Back to Fix & Setup