How to Clean Vinyl Records
Most pops, crackles, and skipping on vinyl is not a record player problem — it’s a dirty record problem. Dust, static, fingerprint oils, and manufacturing residue in the grooves all affect playback. The good news: most of it is removable, and a clean record sounds dramatically better than a dirty one.
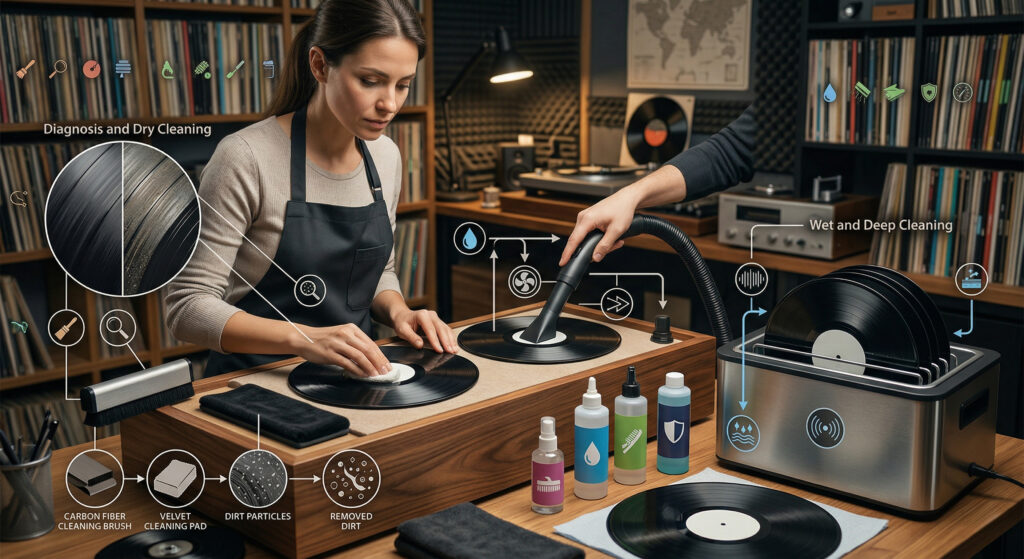
This guide covers three cleaning methods: the quick pre-play brush (every session), the wet clean (for new and used records), and the deep clean (for heavily soiled or thrift store finds).
Method 1 — The Pre-Play Brush (Every Record, Every Time)
What you need: Carbon fibre anti-static brush (~$15–$25)
Even a clean record picks up dust between plays. A 30-second brush before every play removes loose surface particles and discharges static — the two main causes of surface noise.
How to do it:
Place the record on the platter. Start the platter spinning at 33 RPM. Hold the carbon fibre brush lightly on the surface, letting it sit in the grooves for 1–2 full rotations. Then, in one smooth motion, draw the brush toward the edge of the record, collecting the dust. Lift the brush away from the record — don’t drag it back across the surface.
Clean the brush by gently blowing the collected dust away or tapping it lightly against a clean surface.
Method 2 — Wet Clean (New Records and Regular Maintenance)
What you need: Record cleaning solution, microfibre cloth or record cleaning brush, lint-free drying cloth
New records are not clean. Manufacturing residue — release agents used during pressing — coats the grooves and causes surface noise on first play. A wet clean before first play makes a significant difference.
How to do it:
Apply 2–3 drops of record cleaning solution to a microfibre cloth or cleaning brush. Do not apply the solution directly to the record. Working with the grooves — in a circular motion following the circumference of the record, not radially — gently work the solution across the playing surface. Use light pressure. Cover the entire surface in 2–3 full rotations.
Using a clean, dry lint-free cloth, wipe the solution away following the same circular motion. Let the record air-dry for 2–3 minutes before playing.
Important: Keep the label dry. Cover it with your thumb or use a label protector — cleaning solution on the paper label can cause it to bubble or tear.
Method 3 — Deep Clean (Thrift Store and Second-Hand Records)
What you need: Record cleaning solution, record cleaning brush, optional: record cleaning machine
Second-hand records may have years of accumulated grime, mould, and fingerprints embedded in the grooves. A single wet clean may not be enough — you may need to repeat the process 2–3 times. For heavily soiled records:
Apply cleaning solution and use a dedicated record cleaning brush (not a microfibre cloth) in a circular motion with slightly firmer pressure. Let the solution sit on the surface for 30–60 seconds before wiping. Rinse with a second application of clean solution (or distilled water), then dry with a fresh cloth.
For records with visible mould (white or grey spots), mix 25% isopropyl alcohol with 75% distilled water as your cleaning solution. Pure tap water contains minerals that leave deposits in the grooves — always use distilled water.
Watch: How to Clean Vinyl Records
What Not to Do
| Don’t | Why |
|---|---|
| Wipe radially (toward the centre) | Pushes debris into the groove rather than out |
| Use tap water | Mineral deposits remain in grooves after drying |
| Use paper towels or tissues | Scratch the surface with wood fibres |
| Touch the playing surface with fingers | Skin oils leave residue that attracts dust |
| Clean the label with solution | Damages the paper and the ink |
| Play a wet record | Pushes dissolved debris deeper into grooves |
How to Store Records After Cleaning
Store records vertically — never flat, which causes warping over time. Replace paper inner sleeves with anti-static polyethylene sleeves (~$0.20 each). Paper sleeves shed fibres into the groove with every insertion. Anti-static sleeves don’t — and they make a noticeable difference to surface noise on a clean record.
See also: Why Is My Record Skipping? · How to Set Tracking Force · Vinyl 101 Free Course
← Back to Fix & Setup